Remove the entire headlight unit from the motorbike. This process is not explained in this manual as it is very straightforward and there are other sources on the web where you can find explanations on how to do this.
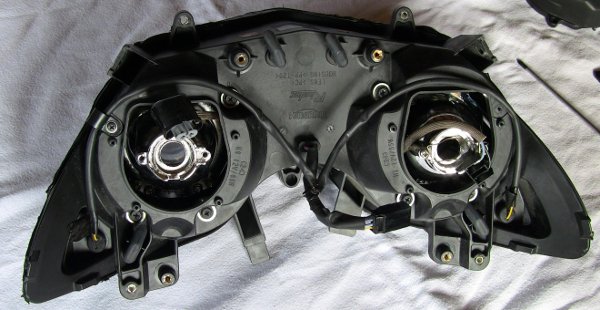
Place the headlight unit on a workbench and remove the two plastic covers of the H7 and H9 lamp housing by removing the four screws holding each of those covers in place. This process is explained in the Tiger manual as part of replacing the headlight bulbs.
Undo the power connectors from both lamps. Remove the H7 low beam lamp by unclipping the wire clip that holds it in place. Remove the H9 high beam lamp by removing the two bolts holding its plastic mounting in place. Remove both lamps. Do not at all remove the original wiring. We will leave this in place to enable us to revert to the original lamps at any time.
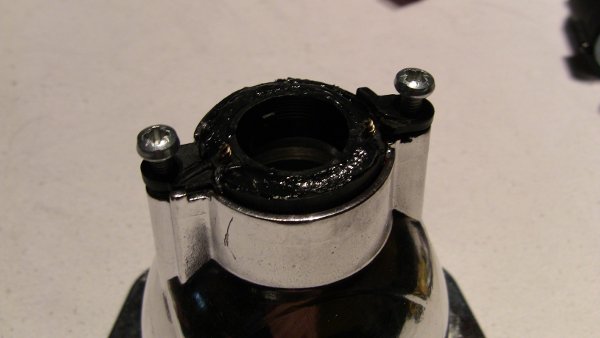
Now it is time to remove the front headlight "glass", which is of course made from plastic. The "glass" is glued into the rear lamp housing using black mastic. It is practically impossible to remove silicone mastic - any solvent that attacks the mastic would at the same time dissolve the headlight housing. The only option is to use a saw and cut along the seam of the headlight glass:

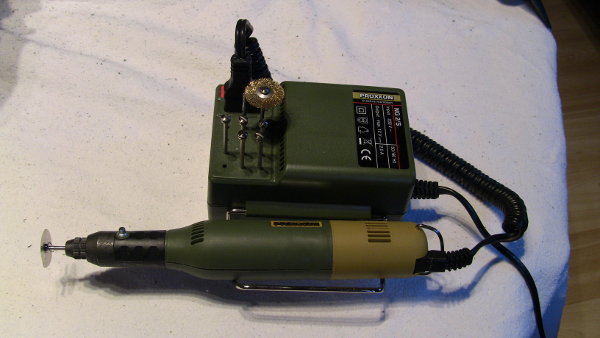
For this job you need a saw that can cut about 8 mm deep into the seam. The "glass" has a kind of "lip" that is pressed into the mastic-filled recess of the headlight housing on assembly in the factory in Spain. This "lip" needs to be cut off and the remnants of the lip later on scraped out of the recess together with the remaining mastic. I use a kind of "Dremel"-type saw that is usually sold for model cars and aircraft assembly. If you know someone who tinkers with model cars or aircraft, then you could possibly borrow such a saw:
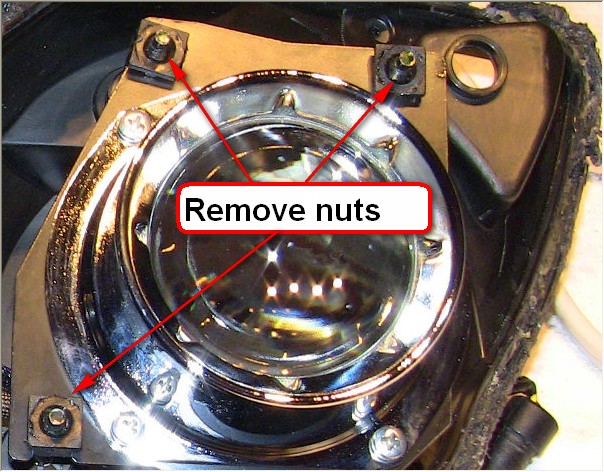
Once the front "glass"-cover is removed, remove the three nuts sitting on the long headlight adjuster bolts from both lamps. Turn the three adjuster bolts counter-clockwise until the two headlight assemblies can be removed (the picture shows the nuts already removed):
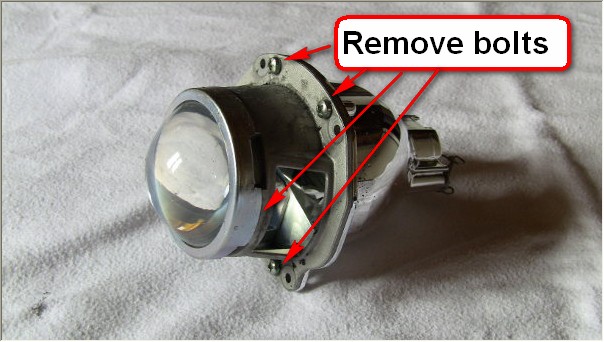
Remove the four bolts that keep the two halves of the lamp housing together:
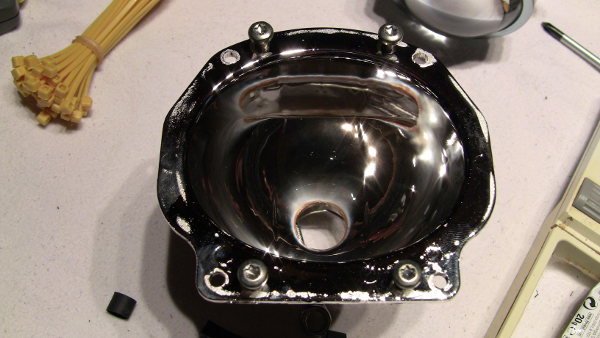
Split the lamp housing. Lens and reflector can now be cleaned (left lamp shown, note the metal sheet for asymmetric low beam):

Here is a picture of the typical damage to the reflector near the lamp seat that you can expect to find after 10000 km with the original H7 headlight:
The massively reduced heat produced by the new HID headlights will ensure that the reflector will not accumulate any further damage. As we can in future also clean the lenses and the reflectors you can expect the headlight unit to last for much longer than any unmodified unit.
Now that we have cleaned the lamps and the reflectors we can concentrate on the conversion itself:
The H7 HID replacement lamp is a straight fit: put it into place by reversing the steps of removing the old original H7 lamp. The H9 replacement is far more difficult. It is possible to buy H9 replacement HID kits (see the parts list page for an example), but I do not want to use the right side headlight as a high-beam only light. I want to convert the old H9 high beam unit into a permanent low beam headlight to have both headlights on at low beam at all time. To achieve this we will convert an H4 HID lamp kit for this purpose. The rest of this page will show you how to do this...
Remove the plastic mounting ring from the original H9 bulb:
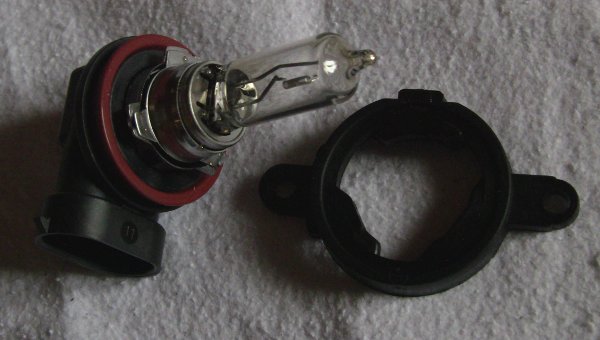
We will use this ring to mount the HID lamp into the lamp housing in the same way as the original H9 lamp was bolted to it.
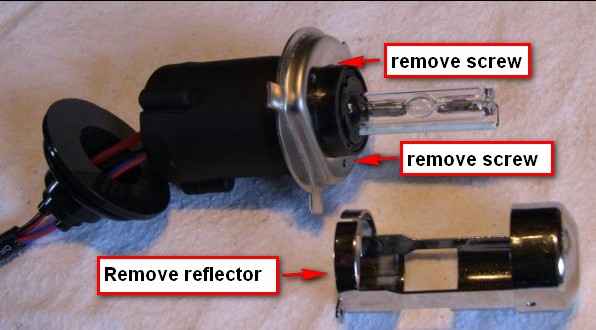
Take the H4-type HID lamp which is to replace the H9 lamp. Unbolt the two small bolts that hold the metal reflector. Remove the reflector (see picture):
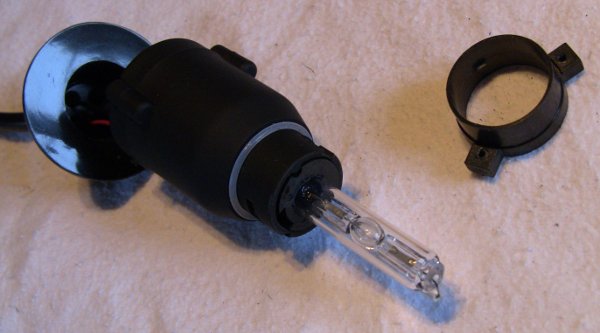
Then take off the metal base plate from the HID lamp:

Remove the plastic neckring from the HID lamp by twisting it anticlockwise by about 30 degrees:
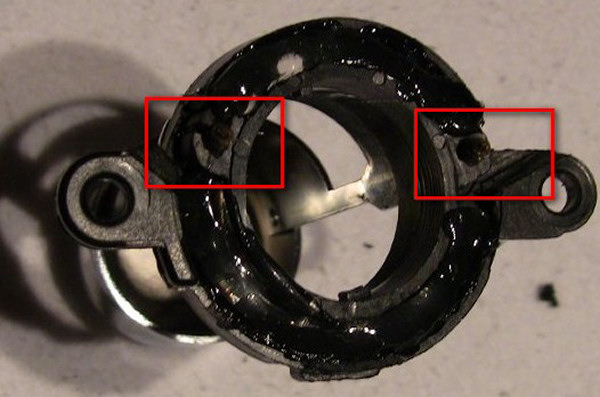
Grind off enough material from rear side of the plastic mounting ring which we previously removed from the H9 lamp to form a recess big enough to insert the two lugs of the plastic neckring into the plastic mounting (see red rectangles in picture). The lugs should be flush with the plastic mounting. Take good care to grind off the material at the correct spots to ensure the metal reflector will go in underneath the HID bulb (see picture for details). Note the position of the small plastic "nose" inside the neckring in relation to the metal reflector:
Note that in above image I have already fixated the plastic neckring using clear mastic. Next use two self tapering bolts to bolt the metal reflector onto the plastic mounting. The bolts have to go through the plastic mounting and "bite" the bolt holes of the lugs of the plastic neckring at the far side, holding these three components together. The mastic in above picture is just for filling purposes, the components however are kept together with those two bolts. The finished item should look like this:
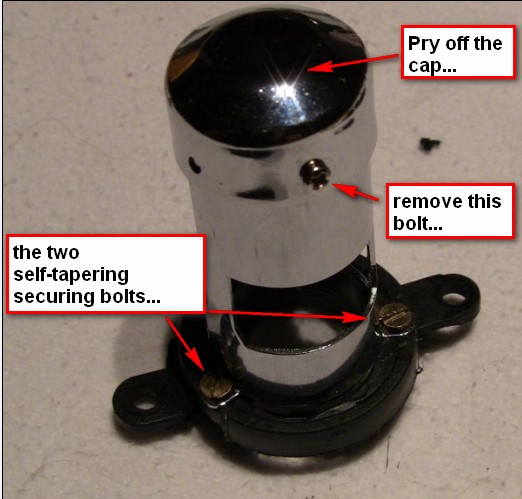
In above image you can clearly see the two gold-coloured securing bolts that keep the lot together. The metal top cap of the lamp holder is not required for a Tiger 1050 due the optical design of the lamp. Remove the small bolt (see image above), then pry off the metal cap.
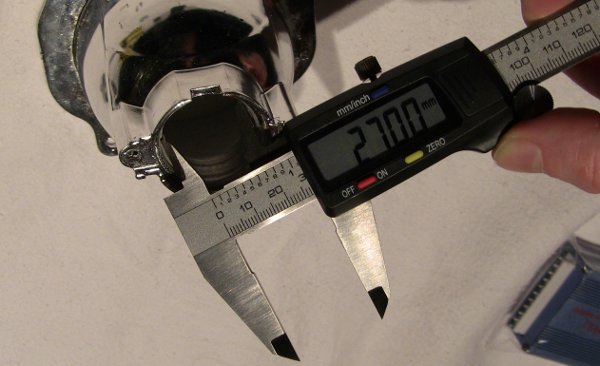
The diameter of the metal reflector of our newly made lamp holder is about 25 mm. The hole through which the old H9 lamp was inserted into the alloy lamp housing is only 18 mm in diameter. So we have to widen this hole. The body of the lamp housing is made from aluminium with a reflective coating on the inside. When drilling into the housing to widen the bore we must ensure that he reflective coating is not damaged or flakes off. Here is a picture of a lamp body, drilled to 27 mm width:
I used a special conical drill to widen the hole. This drill is usually used to make holes for radio antennas into car body panels.
The newly made lamp holder should now fit into the aluminium lamp housing:
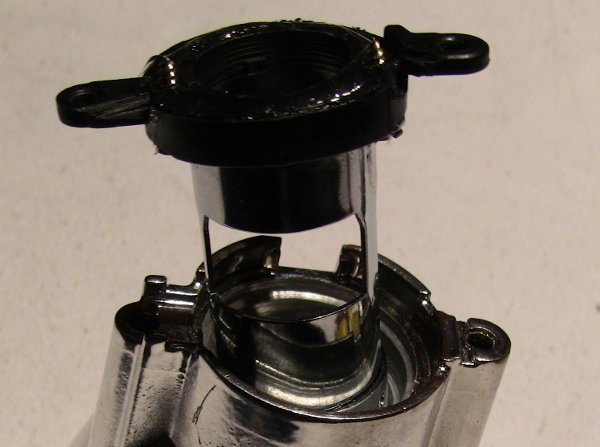
Once fully inserted the result should look like this:
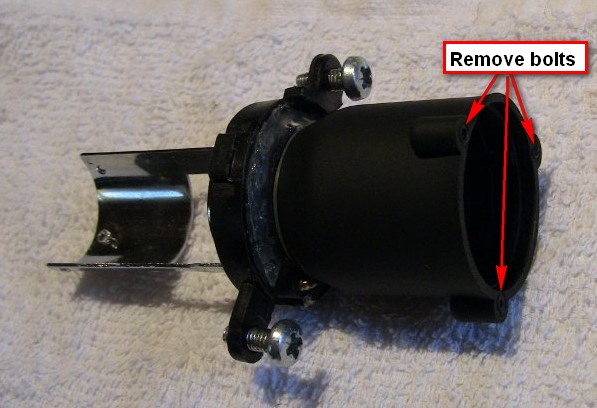
Remove the three bolts keeping the rear plastic cover in position and take the lamp out of its housing. This is the new lamp holder with the now empty lamp housing inserted:
Now take the lamp removed in the previous step from the housing and carefully clear the two main lamp cables from the tape holding it to the copper coil. Cut off the copper coil using a small saw or a similar tool. Underneath the copper coil you will reveal the magnet which in the original configuration allowed the lamp to slide forwards and backwards. Also you should cut away the rear housing cover which is still attached to the cable. This picture shows the lamp with the copper coils already removed, but the rear cover still in place:
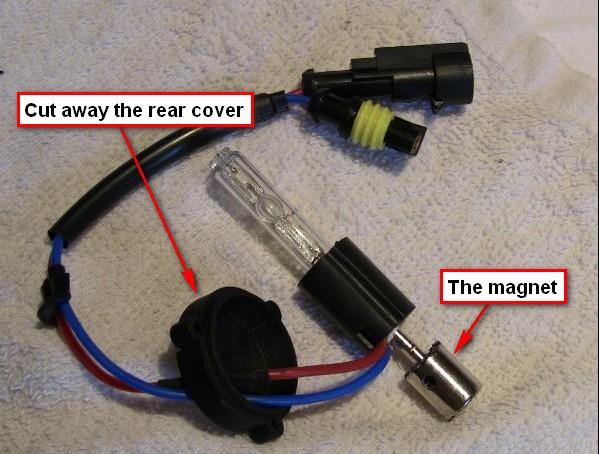
Now cut off the magnet using a grinder or a metal saw. Cut close to the magnet to leave as much as possible of the metal shaft attached to the magnet in place (see picture below):
Insert the lamp back into the now shortened housing. Shortening the housing ensures that the original dust covers of the headlamp housing will fit back in place without modification. The lamp has to be inserted back into the shortened housing. Place the HID lamp exactly in the position it has had in the original configuration at low beam (see picture below). This ensures that the lamp is in the optical centre for proper low beam operation. If in doubt, take the original H9 lamp and check the position of the filament; the HID light emitting "drop" must be at exactly the same location as the filament of the old H9 lamp was.
Then fill the cavity of the housing with a suitable filler. I used green epoxy filler compound which is well suited for the job and heat resistant up to 200 degrees Celsius:
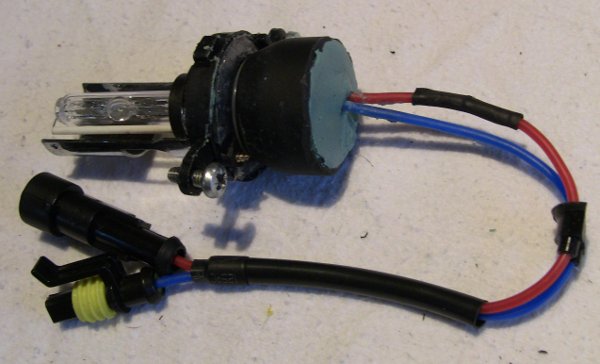
The lamp and its modified holder are now ready to be re-fitted into the headlight assembly.
See the next page for reassembly and wiring instructions.